
You can beat half of DragonSword: Awakening's mid-game content on raw damage stats alone. The other half — the brutal boss rushes, the stamina-draining traversal puzzles, the fights where your healer runs dry — that's where cooking stops being optional. This guide breaks down the three cooking methods, what each one actually does to your stats, and where to farm the ingredients that matter, so your kitchen stops being a checkbox and starts being a real combat resource.
Recipes
All 73 meals with ingredients and effects — searchable by Grilling, Boiling, and Slicing.
Browse Recipes Database →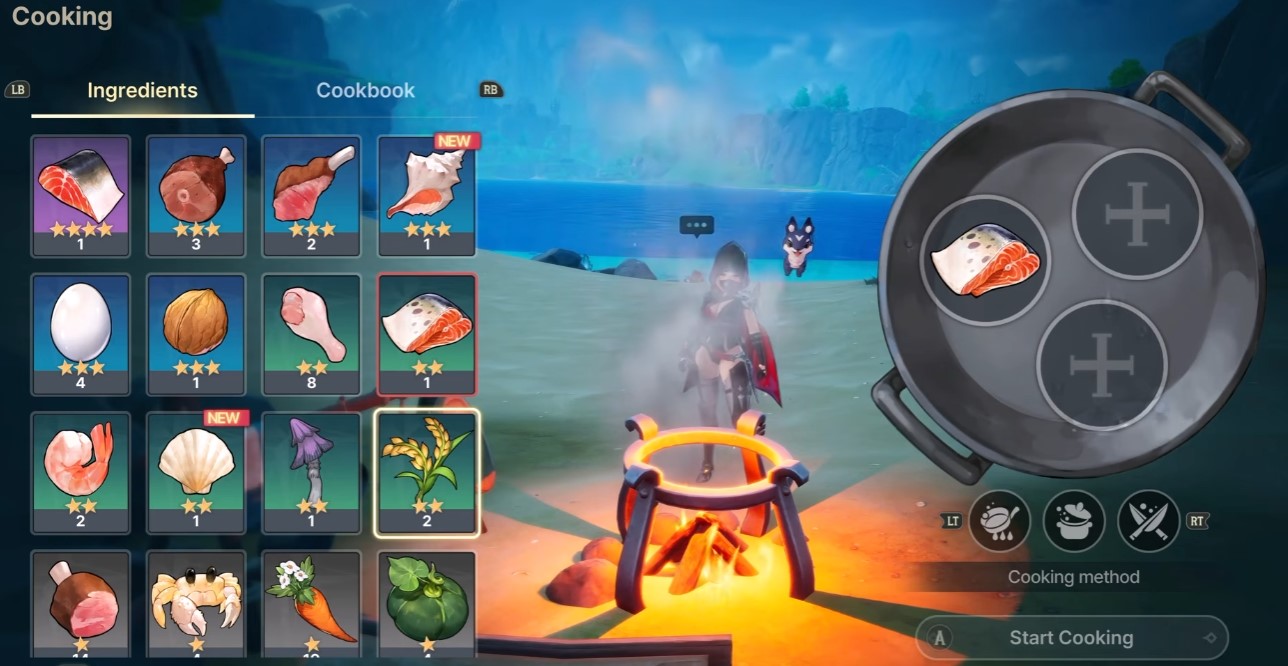
Grilling, Boiling, and Slicing — three cooking methods that turn gathered ingredients into healing, buffs, and stamina support.
Overview of the Cooking System
Cooking isn't a side activity here. Once you hit end-game zones, meals become your main source of sustained healing and buffs outside of potions, and potions run out fast.
The system splits into three methods: Grilling, Boiling, and Slicing. Each one locks you into a specific type of effect — there's no overlap, so picking the right method matters before you even touch ingredients.
Ingredient star quality is the multiplier you actually care about. A 1-star cut of meat and a 3-star cut produce the same recipe, but the potency gap between them is significant enough to notice in a real fight.
Every character has their own cooking animation, which is a nice touch but doesn't affect output. The one mechanic that does matter: the first time you cook any meal, it's saved permanently to your cookbook. After that, you can multi-craft it in batches instead of cooking one plate at a time — a huge time saver once you're stockpiling for a raid.
Cooking Methods and Their Effects
Here's the breakdown, method by method:
- Grilling — always produces recovery food. Depending on the recipe, this is either personal healing or a full party heal.
- Boiling — always produces a team buff, either offensive (damage boost) or defensive (damage reduction).
- Slicing — always produces a stamina buff, which affects swimming, gliding, and other stamina-gated actions.
- Rare ingredients (Honey and similar) — these can push a recipe into resurrection territory, a tier above standard healing.
One detail that trips people up: pulling a single ingredient out of a recipe doesn't just weaken it — it cycles the recipe into a completely different variant of the same dish. If your walnut meal isn't hitting the numbers you want, try swapping one component before assuming the recipe is bad.
Best Ingredient Farming Spots
Ingredients aren't evenly distributed, and some routes are dramatically more efficient than others.
Wild animals and meat. There's a specific farming area that consistently produces strong meat yields — worth scouting early. The general rule: boars in higher-level zones drop higher-tier meat, so don't waste time farming low-level boars once you've outleveled that region. Animals and plants respawn after you relaunch the game, which makes save-and-reload farming a legitimate (if slightly tedious) strategy.
Fishing. Approach fish while you're in the water and mash the triangle button to reel them in. It's simple but a little finicky at first. One tip that actually helps: ride a smaller wolf mount while fishing — it comes with underwater buffs that make the whole process smoother.
Wheat and plants. Wheat doesn't just get picked up — you have to actively attack wheat fields to harvest it. Several other plants in the game follow the same rule, which isn't obvious unless someone tells you.
Ingredient merchants. Scattered across the map, each marked with a distinct icon. These are your backup source when a specific ingredient refuses to spawn where you need it.
Barrels. Smashing barrels in the open world is an underrated source of random food drops. It's not a dedicated farming method, but it adds up over a long play session.
Learning Recipes and Passive Quests
Most of your recipe list won't come from a shop — it comes from random side quests scattered through the world.
Look for NPCs with three dots hovering over their head. That icon flags a passive quest, and completing it usually rewards either a new recipe or adventure rank experience.
A solid example: Seagull Village. An NPC standing on the docks requests a seafood brisket, and finishing that quest hands you a recipe you won't find anywhere else on the early map. It's a small quest, but it's the kind of thing easy to walk past if you're not paying attention to the NPC icons.
If your cookbook feels thin a few hours into the game, the fix usually isn't more farming — it's slowing down enough to notice the three-dot NPCs you've been running past.